
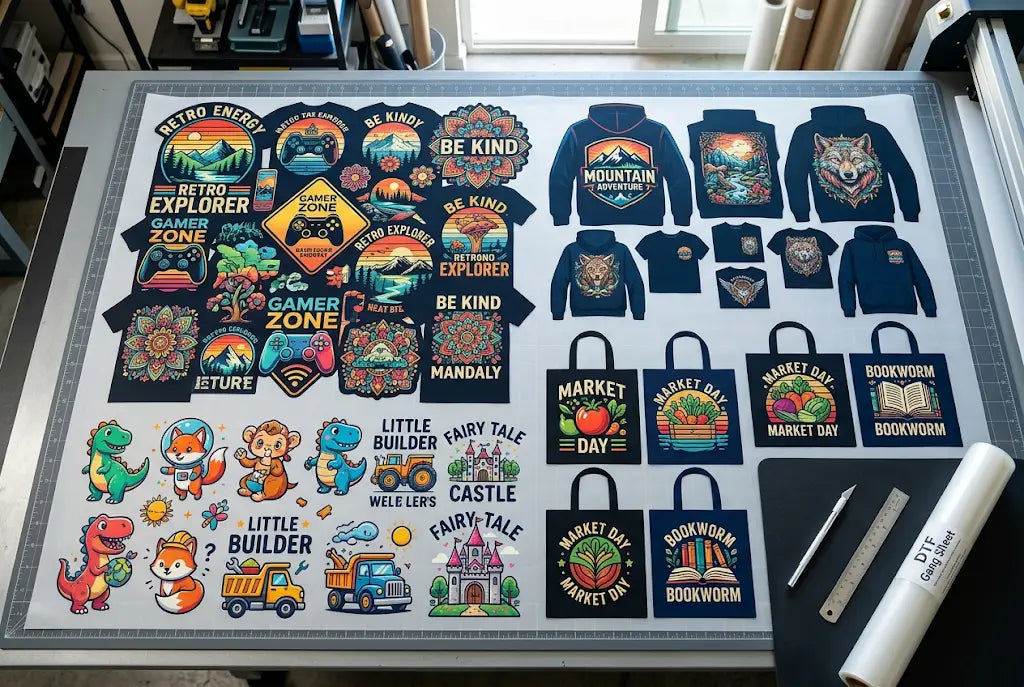
Ordering separate sheets for every product is how most teams burn budget without realizing it. You get an order for 100 adult tees, 40 hoodies, 25 totes, and 60 youth shirts, and suddenly you're paying for four different DTF transfer gang sheet runs, four shipping charges, and four setup times. That's before you count the cutting and sorting.
You can fit all four product types on a single sheet if you treat the DTF gang sheet like a production floor plan. A 22x60 gives you 1,320 square inches of printable film. When you lay it out by zones, that one sheet can cover the entire mixed job with room to spare. And it drops your cost per logo from around $1.80 down to under $0.60.
Why Mixing Product Types Creates Waste and Missed Deadlines
For promotional distributors, marketing agencies, and corporate branding firms, the problem is not artwork. It's layout logic. Most people drop every logo onto the sheet in the order they receive it. A 12-inch back print ends up next to a 3-inch left chest, then a 4-inch tote graphic. That feels fast, but it creates expensive problems downstream.
First, you waste an average of 28% of your film. Print service data from 2024 shows that unplanned gang sheet layout leaves 350 to 400 square inches empty on a 22x60. At $0.45 to $0.65 per square foot for film plus $0.80 in ink, that's $4 to $6 thrown away per sheet. Multiply that by 20 sheets a week and you're losing $400 a month.
Second, cutting slows to a crawl. When sizes are mixed randomly, your cutter has to stop, measure, and reposition for every piece. A sheet that should take 4 minutes to cut takes 12. Third, you get pressing errors. Hoodies need a lower temp and longer dwell than tees, and totes need more pressure. When designs aren't grouped, your press operator mixes them up and you reprint. And reprints on a rush corporate job can cost $45 in overnight film alone.
How to Plan Your Custom DTF Gang Sheet Before You Open the Builder
You can save the most time by sorting on paper first. Don't open the gang sheet builder yet. This step is what lets you maximize gang sheet space every time.
List every logo with its finished print size and its product. Adult front is usually 10 to 11 inches wide. Hoodie front is 10 inches but needs more margin for seams. Left chest is 3.5 to 4 inches. Youth is 8 to 9 inches. Tote bag prints are often 8x8 or 9x9.
Then group by size, not by client. All the 10 to 12 inch designs go in one zone at the bottom of the sheet. All the 3.5 to 4 inch left chest logos go together at the top. All the mid-size 8 inch designs go in the middle. This is the core of a clean gang sheet layout.
You should also match quantity to the zone. If you need 40 left chest prints and only 10 large backs, don't put 10 and 10. Fill that top row with 40 small ones. The sheet should reflect the real job ratio, not just one of each logo.
How to Arrange Designs on a Gang Sheet for Four Product Types
You can make a sheet that looks nice on screen and still fails on the press table. A good layout isn't about looking pretty. It's about moving fast at the cut table and the heat press. And that's especially true when you have multiple designs on one gang sheet.
- Set your sheet size to match the job. Don't default to 22x24. For mixed product runs over 30 pieces, a 22x60 custom DTF gang sheet costs $18 to $24 and cuts your per-transfer cost by 35% compared to three small sheets. You can verify current pricing on major DTF supplier sites — most list 22x60 at $19.99 as of mid-2025.
- Build zones. Think of the sheet as three horizontal bands. The bottom band is for your largest graphics, hoodies and adult backs. The middle band is for standard adult fronts and tote graphics. The top band is for small left chest, sleeve, and youth chest logos. When you keep zones, your cutter can cut in straight lines and your press operator knows what is what.
- Set real spacing. You can leave 0.75 inch between large designs and 0.5 inch between small ones. That's enough to cut without nicking another transfer and tight enough to not waste film. If you go under 0.25 inch, the blade drags and you lose transfers.
- Keep peel direction consistent. All designs should face the same way. Don't rotate some 90 degrees just to squeeze them in unless your gang sheet builder has true auto-nesting. Rotated designs confuse press operators and increase mis-press by about 15% in mixed jobs.
Why You Should Use a Gang Sheet Builder Instead of Manual Layout
You can build this in Canva, Photoshop, or Illustrator, but for a DTF gang sheet with four product types, a dedicated gang sheet builder is faster and more accurate. Manual builders in Canva don't show true print size and they don't calculate cost per logo.
A good builder lets you upload all PNGs with transparent backgrounds, drag to set size in inches, and it locks resolution at 300 DPI. It also shows you live how many square inches you've used. Shops that switch from Photoshop to a builder cut layout time from 45 minutes to under 7 minutes.
And for corporate jobs, speed matters. When a branding firm needs to add 20 more tote logos at 4 pm, you don't want to rebuild the whole file. With a builder, you can add and it re-flows. That's how you learn how to fit multiple designs on a gang sheet without starting over.
How to Fit Multiple Sizes Without Losing Quality
This is the technical part that kills quality if you skip it. Your files must be 300 DPI at actual print size, with at least 150 pixels of transparent padding trimmed. If you upload a 72 DPI file and stretch it to 10 inches, it will look pixelated after press.
You should export every logo as PNG, sRGB, transparent background, no extra effects. For black hoodies, add a 2-pixel white stroke inside the file if the logo is dark, so it pops. For totes, which are often textured canvas, bump up ink density slightly — most printers call this 70% white underbase.
And don't mix file quality. If one logo is vector and another is a low-res JPEG, the JPEG will look dull next to it. Convert everything to the same PNG standard before you arrange. If you're wondering how you can keep color consistent across a DTF transfer gang sheet, standardization before layout is the answer.
How to Cut and Press Faster When Products Are Mixed
Once the sheet is printed, don't cut all at once and toss them in a pile. You can cut by zone. Put all hoodie transfers in one envelope, all tee fronts in another, all totes in a third. Label them with product and temp: 310F for 12 seconds for tees, 300F for 15 seconds for hoodies, 320F for canvas totes.
This is where DTF Promo customers save the most rework. When transfers are grouped, the press operator doesn't have to guess. And for promotional distributors handling 4 product types for one client, that grouping is what keeps the job on time.
You should also press a test. One tee, one hoodie, one tote. Check adhesion at the edge. If the tote needs more pressure, you know before you run all 25. That one test can save you an hour of rework.
Conclusion
You can put t-shirts, hoodies, totes, and kids designs on one DTF gang sheet without chaos if you plan before you upload. Sort by size, build clean zones, leave cuttable gaps, and keep your press workflow in mind from the start.
When you do that, one sheet does the job of three. You cut faster, you press with fewer errors, and your cost per logo drops by more than half. And for teams handling corporate branding, that efficiency is what lets you hit a deadline and still make money. For your next mixed order, try the zone method on a 22x60 and see the difference at the press table in the first 10 minutes. If you want a second set of eyes, DTF Promo will check spacing and sizing before print.
What's Your Next Step?
Upload your artwork and we'll take care of the printing with fast turnaround and dependable quality.
Frequently Asked Questions
How Can You Organize a DTF Gang Sheet With Different Sizes?
You can group by size in horizontal zones, largest at the bottom and smallest at the top. Leave 0.75 inch between large graphics and 0.5 inch between small ones. Keep all designs facing the same way so cutting stays straight. This keeps your DTF gang sheet press-ready and cuts waste to under 10 percent in production.
What Is the Best Gang Sheet Builder for Multiple Product Types?
The best builder shows live size in inches, locks 300 DPI, and auto-calculates film usage. Look for one that lets you upload transparent PNGs, drag to resize, and re-flow when you add pieces. DTF Promo includes a builder that does this and shows real-time cost per transfer before you order anything.
Can You Put Hoodie and T-Shirt Designs on the Same DTF Gang Sheet?
Yes, you can and you should. Put hoodie backs in the bottom zone and tee fronts in the middle. Cut them into separate labeled piles after printing. Press hoodies at slightly lower temp and longer dwell than tees to account for thicker fabric and seams that need more heat.
How Much Space Should You Leave to Maximize Gang Sheet Space?
You should leave 0.5 to 0.75 inch between transfers. Anything under 0.25 inch risks cutting into another design. Anything over 1 inch wastes film. For a 22x60, saving 0.5 inch per row can add 4 to 6 extra small logos, which drops your cost per logo by about 12 percent overall.
How Do You Arrange Designs on a Gang Sheet for Tote Bags?
You can treat totes as medium-size prints, usually 8x8 to 9x9 inches. Place them in the middle zone between large backs and small chest logos. Use slightly higher pressure when pressing because canvas is textured. Keep tote graphics away from very small logos so you can cut them in straight lines.
What File Type Works Best for a Custom DTF Gang Sheet?
Use PNG with transparent background, 300 DPI at actual print size, sRGB color profile. Trim excess transparent padding so you don't pay for empty space. Avoid JPEGs because they add a white box you'll have to cut around, which slows production and adds cost.
How Many Transfers Fit on a DTF Gang Sheet?
A 22x24 fits 12 to 15 large 10-inch designs or 48 to 60 small 4-inch left chest logos. A 22x60 fits 35 to 40 large or 120 to 140 small. Mixed layouts, like tees plus hoodies plus totes, average 65 to 75 transfers per 22x60 when zoned correctly by size.
Does DTF Promo Check My Gang Sheet Layout Before Printing?
Yes. Every sheet uploaded to DTF Promo gets a quick spacing and resolution check before it goes to print. If gaps are too tight or a file is under 200 DPI at size, the team flags it so you don't waste film or miss a corporate deadline for your client.
How Do You Avoid Wasting Film on a DTF Transfer Gang Sheet?
You can sort by size first, then fill rows completely before starting a new row. Don't leave random holes. Use a builder that shows used versus empty square inches. Shops that zone by size waste 8 to 12 percent versus 28 percent when layouts are random, based on 2024 production data.
Can You Reuse a Gang Sheet Layout for Future Orders?
Yes, you can save your zone template. Keep bottom for large backs, middle for fronts and totes, top for small chest. Next time you get a similar mixed corporate order, just swap logos into the same spots. This is how you scale custom orders without rebuilding files every time.