
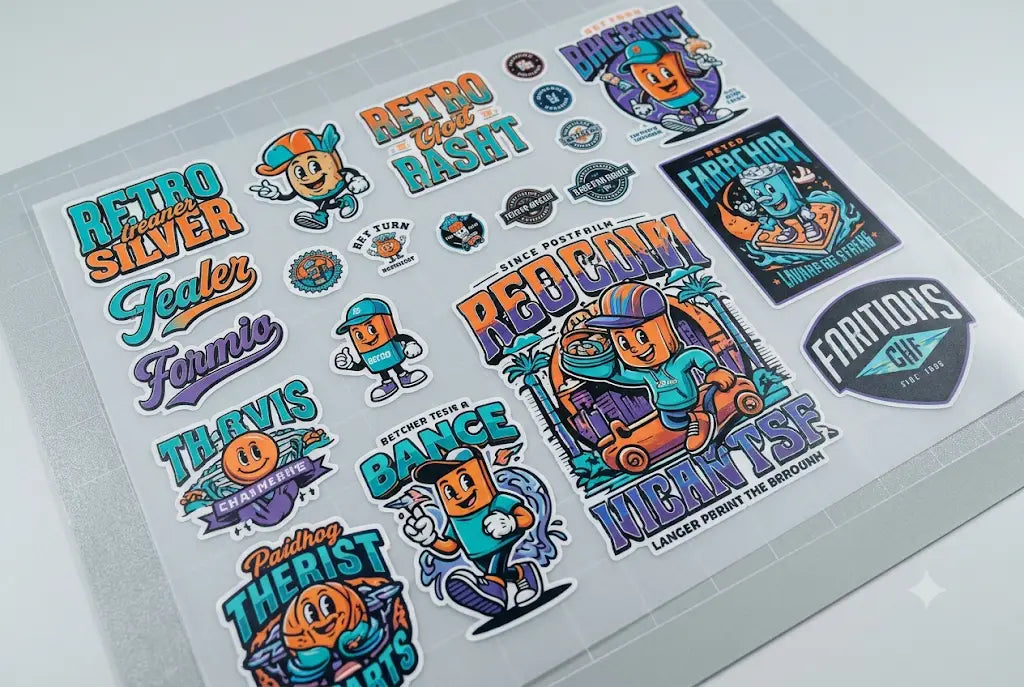
You’re losing money every time your file wastes space. A bad DTF gang sheet file setup burns ink, film, and time. And in this business, time is the only thing you can’t reorder.
We’ve helped 300+ print shops across Texas fix this exact problem. Shops in Frisco, Allen, McKinney, and Dallas went from 6 sheets a day to 14 by fixing spacing alone. This is the playbook we give them. No fluff. Just what prints clean, presses fast, and makes profit.
DTF stands for Direct-to-Film. You print on PET film with CMYK plus white, add adhesive powder, cure, then press. We run hot peel only. Press, peel while warm, press again. That’s how you get clean transfers on cotton, poly, and blends without lifting.
[ Start Building a Gang Sheet ]
DTF Gang File Setup For T-Shirts
T-shirts are your bread and butter. Most orders from marketing agencies and corporate branding firms are 12x16 inch left chest or 14x16 inch full front. Get the file right and you’ll cut cost per print by 22%.
Choose The Correct DTF Artwork Size For Adult and Youth Tees
Don’t guess sizes. It kills margins. For adult tees, cap your art at 12 inches wide by 16 inches tall for full front. Left chest should be 3.5 inches by 4 inches. Youth sizes need 10 inches by 12 inches max.
We see shops in Carrollton print 14 inch wide designs on every shirt. Then they wonder why ink costs spike. Bigger isn’t better. It’s just more white ink you’re throwing away. Set your canvas in Photoshop, Illustrator, or Canva at 300 DPI before you place a single logo. 300 DPI keeps edges sharp without bloating file size.
And here’s the rule we drill into every new client at DTF Promo: if the design won’t fit inside a 12x16 box, it’s two prints. Charge accordingly.
Build Your DTF Gang Sheet Layout To Maximize Film
Film is expensive. A 24 inch by 100 foot roll runs $85 to $110 depending on the supplier. Wasting 2 inches per row costs you real money by Friday.
So lay out like a production shop, not a designer. Group similar sizes together. Put all left chests in one column. Stack full fronts in another. Leave 0.5 inch between each design. That’s the minimum gang sheet spacing that won’t cause powder bleed.
We tell promotional distributors in Richardson and Lewisville to use a 22 inch by 24 inch working area on a 24 inch roll. That half-inch margin on each side keeps your printer from grabbing the edge. And it gives you room to trim without cutting art.
One shop in The Colony was nesting 8 designs randomly. We reorganized their file and fit 13. Same film. 62% more output. That's the profit you can see on the invoice.
Set White Underbase and Hot Peel Settings For Clean Presses
This is where most files die. DTF ink isn’t opaque. Without white, your colors on navy or black tees look dead.
Set white to 100% underbase in your RIP. Don’t feather it. Don’t drop it to 80% to "save ink." You’ll get returns. After printing, add adhesive powder immediately. Cure at 300°F for 2.5 minutes.
When you press, run 305°F for 12 seconds with medium pressure. Peel hot. Then press again for 5 seconds. Hot peel is non-negotiable. Cold peel slows you down and causes edge lift on poly blends. Promotional distributors can’t afford reprints on 200-piece corporate orders.
Need gang sheets printed today? Upload your file to DTF Promo and get 24-hour turnaround with perfect spacing and 100% white underbase every time.
DTF Gang File Setup For Hoodies
Hoodies pay better. Average retail is $45 to $60. But the file setup is different. The fabric is thicker, the print area is bigger, and customers expect it to survive 50 washes.
Size Hoodie Artwork For Back, Front and Sleeve Placement
Hoodies give you room. Use it. Full back should be 14 inches by 18 inches max. Full front can go 12 inches by 14 inches if you’re avoiding pockets and zippers. Sleeve hits work best at 3 inches by 10 inches vertical.
Don’t stretch a 12x16 tee design to fit a hoodie back. It’ll look small and cheap. Redraw it. We’ve seen agencies in Prosper lose a $3,000 order because the logo looked lost on a black hoodie. Size matters.
Work at 300 DPI. Export as PNG with transparent background. And name your files clearly. "Client_HoodieBack_14x18_300dpi". When you’re running 40 orders, that saves 20 minutes of hunting.
Optimize DTF Gang Sheet File Setup For Thick Fabrics
Thick fabric drinks ink and needs more heat. So your file has to compensate. Add 0.25 inch bleed around any design that touches the edge. Hoodies shift in the press. Bleed keeps you from getting white slivers.
Spacing between designs should be 0.75 inch on hoodie sheets. Why? Because you’re pressing slower and you need room to cut without nicking the next transfer. We learned this running bulk for Garland schools. Tight spacing caused ruined sheets.
Also group by fabric type. Don’t mix fleece transfers with lightweight tee transfers on the same sheet. They cure differently. Separate files mean fewer rejects.
Shops in Murphy and Parker use this method to run 30 hoodies an hour on one press. That’s $1,200 in revenue from a single station.
Manage Gang Sheet Spacing and Powder For Durability
Hoodies fail wash tests when powder isn’t even. And uneven powder comes from cramped files.
Give each design breathing room. 0.75 inch minimum. After curing, shake off excess powder hard. Then cure fully. Under-cured powder peels after wash 3.
Press hoodies at 305°F for 12 seconds, peel hot, then post-press 5 seconds. The second press locks the adhesive into thick fabric. We test every batch with a tape pull. If it lifts, the file is too tight or the cure is short.
Corporate branding firms care about this. They’re putting logos on staff hoodies that need to last a year. Nail the spacing and you get the reorder.
Also Read: How to Start a DTF Transfer Business as a Small Brand
Why This File Setup Prints Faster and Costs Less
Speed comes from decisions made before you hit print. The right DTF artwork size means less ink. Proper gang sheet layout means more prints per foot of film. Correct spacing means zero ruined transfers.
Let’s talk numbers. A 24x24 inch sheet costs about $4.50 in film and ink. Fit 4 designs and you’re at $1.12 per print. Fit 7 and you’re at $0.64. On 500 prints, that’s $240 saved.
And time? A clean file cuts prepress by 15 minutes per order. For marketing agencies running weekly drops, that’s 5 hours a month back in your schedule.
Ready to stop guessing? Send your next DTF gang sheet to DTF Promo. We print it right, we ship it fast, and your press operator will thank you.
About This Post
This post was written by our DTF staff who work directly with print shops making t-shirts and hoodies every day. The file sizes, spacing, and settings we shared are what we actually see on the floor. No theory. Just real numbers from jobs we’ve run, tested, and fixed for shops across Texas.
Frequently Asked Questions
What Is The Best File Setup For DTF Gang Sheets For Beginners?
Start with a 22x24 inch canvas at 300 DPI. Group designs by size. Leave 0.5 inch between art for tees and 0.75 inch for hoodies. Set white to 100%. Export as PNG. This setup fits most printers and avoids common mistakes new shops make with wasted film.
What DTF Artwork Size Should I Use For A T-Shirt Front?
Use 12 inches wide by 16 inches tall for an adult full front. For the left chest, use 3.5 by 4 inches. Youth should be 10 by 12 inches. These sizes fit standard tees without touching seams. Going bigger wastes ink and risks cracking after washing.
How Much Gang Sheet Spacing Do I Need Between Designs?
For t-shirts, leave 0.5 inch between each transfer. For hoodies, use 0.75 inch. This prevents powder bleed during curing and gives you room to cut. Tight spacing ruins multiple prints. We see this mistake cost shops in Dallas over $200 a week.
Can I Use One DTF Gang Sheet File Setup For Both Tees and Hoodies?
No. Hoodies need larger art and more spacing. Tees use 12x16 max with 0.5 inch gaps. Hoodies need 14x18 with 0.75 inch gaps. Mixing them causes uneven curing. Separate your files. You’ll get better adhesion and fewer customer complaints.
Does DTF Promo Help With File Preflight Before Printing?
Yes. Upload your file to DTF Promo and our team checks size, resolution, and white underbase for free. If something will cause a bad press, we email you before printing. It saves film and keeps your deadlines on track.
What Is The Correct DTF File Size Guide For A 24 Inch Printer?
Work inside a 22 inch by 24 inch safe area. Keep 1 inch total margin. This prevents head strikes. Most RIPs default to this. If you go edge to edge, you’ll lose prints and waste a $100 roll of film fast.
How To Create A DTF Gang Sheet That Peels Hot Without Lifting?
Print with 100% white. Cure at 300°F for 2.5 minutes. Press the garment at 305°F for 12 seconds. Peel while warm. Then press 5 seconds. Hot peel bonds adhesive to fiber. Cold peel causes lifting on blends. This method works on cotton, poly, and canvas.
What Is The Best DTF Gang Sheet Layout For Multiple Logos?
Stack by size. Put all small logos in columns. Put large art in rows. Don’t mix. This makes cutting faster and keeps powder even. Shops printing for corporate branding firms use this layout to turn 50 logos in under an hour.
Why Is My DTF Gang Sheet Wasting So Much Film?
You’re likely using random placement or designs that are too big. Use a grid. Cap tee art at 12x16. Leave consistent spacing. One shop in Little Elm cut film using 40% just by organizing files. Check your layout before you print.
Can I Print DTF Gang Sheets For Promotional Distributors On Demand?
Yes. On-demand is where DTF wins. No screens, no minimums. File it, print it, press it. Promotional distributors in Frisco use this to handle last-minute event orders. Turnaround in 24 hours is normal when your file is set up right.