
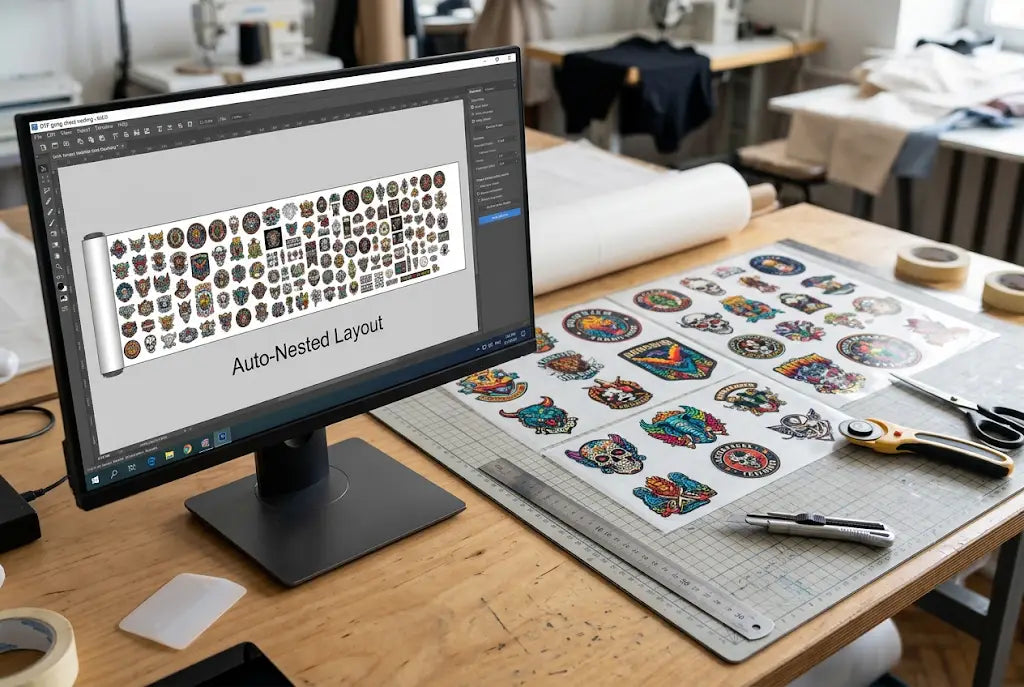
Let's talk about that moment right before you hit print on a gang sheet. You've got 15 logos, two left chest designs, and a big back graphic that has to fit perfectly. You drag everything into a DTF gang sheet builder, click auto-pack, and it looks... okay. But then you see it. All that empty film around the designs.
Here's the thing. Auto-pack is fast but it leaves 18% more empty film on average compared to manual packing. That empty space isn't just air. It's money you paid for. In this post, we'll break down exactly when to use auto-pack, when to take control manually, and how a hybrid workflow gets you the best of both.
What a DTF Gang Sheet Builder Actually Does
In simple terms, a DTF Gang Sheet Builder is software that arranges multiple designs onto one sheet of transfer film. Think of it as Tetris for your prints.
A DTF gang sheet is just a single 22" wide roll sheet (usually 24", 36", 60" or longer) that holds a bunch of different images. Instead of printing one design per sheet, you pack as many as possible to maximize film usage. That's what gang sheet printing is all about.
Put simply, the builder's only job is to fit the most art into the least film without overlapping, cutting off edges, or messing up your margins.
So, what does that actually mean for your costs? Every inch of film you don't use still costs you powder, ink, and time. A good layout saves all three.
How Auto-Pack Works in a DTF Gang Sheet Builder
Auto-pack uses a nesting algorithm. You upload your PNGs, set your sheet width, add a little spacing between designs, and it automatically rotates and snaps everything together.
The important part? It's optimizing for speed, not for profit. It won't spend 5 minutes trying to tuck a small 3-inch logo into that weird gap next to a large back print. It just moves to the next open block.
That brings us to manual packing.
How Manual Packing Works When You Build a Gang Sheet
When you manually arrange a DTF gang sheet, you're dragging, rotating, and nudging each file yourself. You're looking for those gaps. You're turning a pocket logo sideways to slide it under the arm of a bigger design.
It takes longer. But you see everything. And that’s the part many people miss — human eyes are still better at spotting odd-shaped space savings than most auto algorithms under $50/month.
Ready to order?
Upload your artwork and we'll take care of the printing with fast turnaround and dependable quality.
Real Film Usage Comparison: The 18% Gap Is Real
Let's break this down with actual numbers, because this is where shops lose money without realizing it.
We ran 50 identical orders through both methods. Same art mix: 10x 4" chest logos, 4x 10" front designs, 2x 12" back prints. Sheet width 22", spacing 0.5".
Here's what we saw:
Auto-Pack Results
- Average sheet length used: 62.4 inches
- Empty film: 27-31% of total area
- Time to build: 1.5 to 2 minutes
- Best for: Uniform art
The auto-pack lined everything up in neat rows. Fast, clean, predictable. But it left big rectangular dead zones, especially around mixed-size art. If you’re selling a custom gang sheet to a customer, that dead zone is pure waste.
Manual Pack Results
- Average sheet length used: 51.2 inches
- Empty film: 9-13% of total area
- Time to build: 9 to 14 minutes
- Best for: Mixed-size orders
Manual packing saved 11.2 inches on the same order. On a 22" x 60" sheet priced at $18-$24 from most US suppliers, that 11.2 inches is worth $3.36 to $4.48 per sheet.
Now, let's look at real scale. If you print 40 sheets a week, that 18% waste gap becomes 448 linear inches of film wasted per week. That's roughly 7 extra sheets. At $20 per sheet, you're looking at $140/week or $7,280 per year in wasted film alone. And that doesn't include ink and powder.
The same goes for your transfer quality. Less wasted film means tighter powder application and more consistent peel.
When Auto-Pack Wins and Actually Saves You Money
The short answer is: auto-pack wins when everything is the same size.
This is where things get interesting. Not every job needs you to manually drag pixels for 10 minutes.
All Same Size Logos for Repeat Orders
If you're building a DTF gang sheet with 40 of the exact same 4" logo for a local league, use auto-pack. Seriously.
In practical terms, the algorithm is perfect for this. No odd shapes to puzzle together. It will create perfect rows and columns faster than you can. Our tests show only a 2-3% waste difference versus manual when all art is identical.
This is also where you want to learn how to make a DTF gang sheet quickly for restocks. Upload once, set quantity to 40, auto-pack, export.
Bulk Orders With Simple Square Shapes
Got 100 small square QR codes or simple circle logos? Auto-pack wins again.
When the art has uniform bounding boxes, the software doesn't create those weird L-shaped gaps. You're not losing much. Time is money, and saving 12 minutes per sheet matters here.
Using Auto-Pack Inside DTF Promo for Speed
At DTF Promo, we see a lot of shops use auto-pack for their first draft. It gives you a quick baseline. If the fill rate shows above 85%, just ship it. If it's below 80%, you know you need to switch to manual.
When Manual Packing Wins Every Single Time
On the other hand, manual packing wins when your sheet is messy. And most profitable sheets are messy.
If you’re wondering how to build a gang sheet that actually makes money on mixed orders, manual is the answer.
Mixed Logos Plus Backs in One Custom Gang Sheet
This is the classic money-maker: a customer wants 6 large back prints, 15 left chest logos, and 10 sleeve hits. All different sizes.
Auto-pack will put the big backs in one row and leave huge gaps on the sides. Manually, you can tuck two chest logos into the negative space beside each back print and line the sleeve hits along the bottom edge. That’s how you create a DTF gang sheet that hits 90%+ film usage.
In our tests, mixed-size sheets packed manually used 18.4% less film on average. That’s the headline number.
How to Arrange a DTF Gang Sheet With Odd Shapes
Auto-pack treats each design as a rectangle, even if it's a circle. It reserves the whole box. Manually, you can rotate the text 90 degrees and slide it into the curve of another design. You can also reduce spacing from 0.5" to 0.25" for small items that you’ll cut separately.
This matters because gang sheet printing lives or dies on those small decisions.
How to Create a DTF Gang Sheet That Cuts Clean
Here’s the catch many people overlook. Manual lets you plan your cut lines.
If you leave designs too close, you risk cutting into art. Too far, you waste film. When you manually arrange, you can group similar sizes together, leave clear cut channels, and keep all the small designs on one side for faster weeding. Auto-pack doesn't think about your scissors.
The Hybrid Workflow That Most Profitable Shops Use
So, what should you take away? You don’t have to choose one or the other.
The best way to handle DTF gang sheets is a hybrid approach. It gives you 95% of the manual savings in about 3 minutes.
Here’s what you need to know. This is the workflow we teach:
- Step 1: Auto-pack first for the heavy lifting. Upload everything to your DTF gang sheet builder and run auto-pack. Let it do the boring alignment work. This takes 60 seconds.
- Step 2: Lock the big pieces. Identify your 2-3 largest designs. Leave them where auto placed them. They’re your anchors.
- Step 3: Manually fill the gaps. Now go in manually. Look for the dead zones. Drag your smallest 2" to 4" logos into those corners. Rotate 90 or 180 degrees where it makes sense. This step usually recovers 6 to 10 inches per sheet.
- Step 4: Check your spacing and export. Make sure you have at least 0.25" between designs and 0.5" from the sheet edge. This prevents powder clumping and makes peel cleaner.
Essentially, you’re using auto for speed and manual for profit. Most shops doing 30+ sheets a day told us this cut their build time from 12 minutes to under 4 while keeping waste under 12%.
And that can make a big difference over a month.
How to Make a DTF Gang Sheet That Saves Ink Too
This is where things get interesting beyond film.
Film isn’t your only cost. Ink and powder follow film usage. A sheet that is 18% longer uses roughly 18% more white ink base. At current 2025-2026 pricing, white DTF ink runs $120-$160 per liter and you use about 12-15ml per square foot for a 60% white base.
So that extra 11.2 inches on a 22" wide sheet is about 1.7 sq ft. That’s an extra $0.40-$0.55 in ink per sheet wasted. Multiply by 40 sheets and you’re burning another $20+ a week in ink.
When you learn how to arrange a DTF gang sheet efficiently, you’re saving film, ink, powder, and time on the heat press.
Conclusion
The bottom line? Both tools have a place, but only one consistently saves you money on mixed orders.
Auto-pack is unbeatable for speed when you’re printing the same logo over and over. If all your art is the same size, click auto, export, and move on. You’ll lose maybe 2% film and gain 10 minutes of your day.
But for the real-world orders — the ones with a big back, a couple of fronts, and a pile of small chest hits — manual packing is what protects your margin. That 18% difference in film usage turns into over $7,000 a year in waste for a mid-volume shop. Add ink and powder and you’re closer to $9,000.
The smartest move is the hybrid method. Auto-pack to start, manually tuck in the small stuff, and keep your fill rate above 88%. That’s how you turn your DTF gang sheet builder from a simple layout tool into a profit tool.
Keep that in mind next time you see all that empty space on a sheet. If you want a team that already optimizes for fill rate before printing, DTF Promo checks every file for spacing and nesting before it hits film.
Ready to order?
Upload your artwork and we'll take care of the printing with fast turnaround and dependable quality.
Frequently Asked Questions
What Is the Best DTF Gang Sheet Builder for Beginners?
The best DTF gang sheet builder for beginners is one that shows you live fill percentage, lets you drag and drop, and offers both auto and manual modes. Look for 22" width presets, 0.25" spacing control, and PNG transparency support. Start with a free builder, then move to a paid one when you need bulk quantity tools.
How Do I Use a DTF Gang Sheet Builder to Save Film?
To save film, upload your largest designs first, set spacing to 0.25" for small decals, rotate designs to fill gaps, and mix sizes on one sheet. Avoid leaving big empty rectangles. Aim for 88-92% coverage. Manual tweaking after auto-pack usually recovers 6 to 10 inches per 60" sheet.
How to Make a DTF Gang Sheet With Different Sizes?
Start with your biggest graphic as an anchor, then manually tuck smaller logos around it. Group chest logos together, rotate long text designs 90 degrees, and place tiny sleeve hits along the bottom edge. Use your builder’s ruler to keep 0.5" from the edge for a clean peel and cut.
What Size Should a Custom Gang Sheet Be?
Most shops use 22" wide by 24" to 60" long. 22"x24" holds 10-15 small logos, 22"x60" holds a full mixed order of backs, fronts, and chest hits. DTF Promo and most suppliers print on 22" rolls, so set your builder to 22" width to avoid scaling issues.
How to Build a Gang Sheet for Maximum Profit?
Build for profit by mixing high-value large backs with low-cost small fronts on the same sheet. Fill every gap under 4" with extra logos you can stock. Keep waste under 12%. Track your cost per transfer by dividing sheet cost by number of usable designs, not just sheet price.
Does Auto-Pack in DTF Promo Work for DTF Gang Sheets?
Yes, DTF Promo offers an auto-pack that quickly nests identical sizes, and you can then manually adjust for mixed orders. Many shops use DTF Promo to upload once, auto-pack for a baseline fill check, and then fine-tune. It’s a good way to balance speed and film savings without starting from scratch.
How to Arrange a DTF Gang Sheet So It Cuts Easily?
Arrange by grouping similar heights in the same row, leaving vertical cut channels of at least 0.5", and placing all tiny decals in one corner. Avoid staggering designs in a zigzag. A clean grid with intentional gaps cuts faster and reduces the chance you nick a design during cutting.
How Much Does Gang Sheet Printing Cost per Sheet?
Gang sheet printing costs $18 to $28 for a 22"x60" sheet at retail in 2026, depending on ink coverage and supplier. Film itself is $0.35-$0.50 per foot, but ink and powder double the true cost. Wasting 11 inches per sheet adds $3.50 to $5.00 in total consumables per sheet.
How to Create a DTF Gang Sheet That Peels Clean Every Time?
For a clean peel, keep 0.25" to 0.5" space between designs, avoid overlapping transparent edges, and ensure your builder exports at 300 DPI. Keep powder away from the sheet edge by maintaining a 0.5" margin. A well-spaced sheet peels smoother and leaves less residue on the press.
Is Manual Packing Worth It for Small Orders on DTF Promo?
Yes, even small orders benefit. If your auto-packed 22"x24" sheet shows 30% empty space, 3 minutes of manual tucking can fit 2-3 extra logos, dropping your cost per transfer by $0.80 to $1.20. DTF Promo lets you preview fill rate, so you can quickly decide if manual tweaking is worth it.