
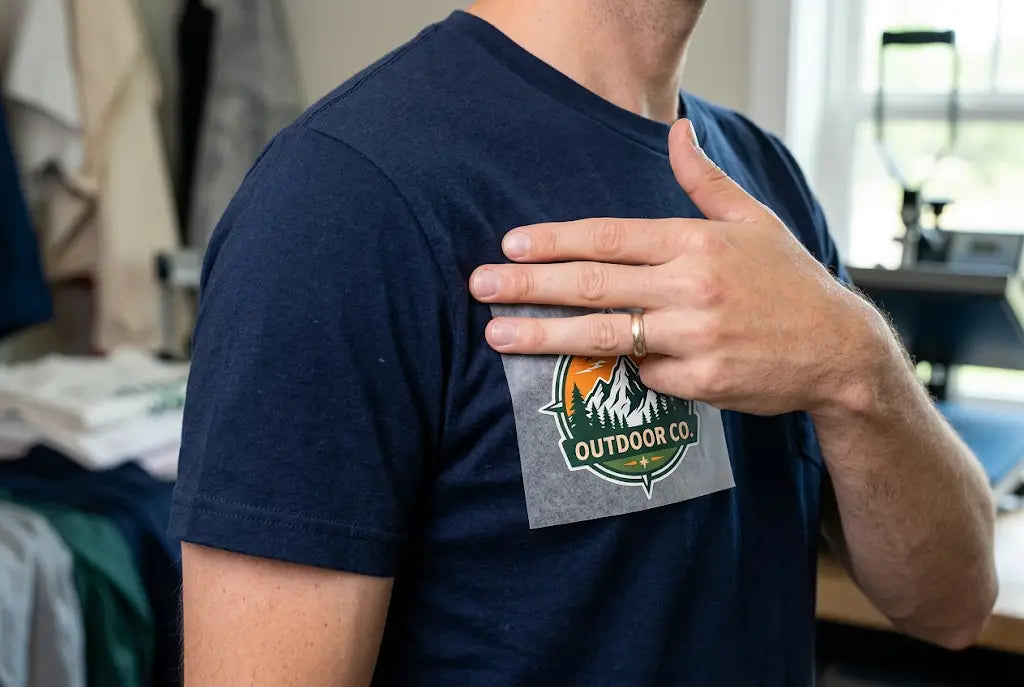
Left chest is where a tiny mistake looks huge. Half an inch too low and your logo drops onto the stomach. Half an inch too far left and it's in the armpit. Clients notice it instantly, especially on polos and corporate uniforms.
Most people guess. They eyeball it and hope it presses straight. That works for one shirt, not for fifty.
But that print only looks professional when the placement is right.
The 3-finger rule is the oldest trick in the shop for perfect left chest DTF transfer placement. No laser. No fancy tools. Just your hand and two real measurements to confirm. Here's how it actually works.
What Left Chest Really Means in DTF Transfer Placement
Left chest means the wearer's left. Not yours when you look at the shirt. That confusion alone causes half the misprints in promo shops.
And left chest does not mean dead center of the left side. It means centered over the left chest muscle. On a size large adult tee, that spot is about 3.5 to 4 inches from the center of the collar. If you measure from the side seam, you will drift too far out and the logo ends up near the armpit. That looks amateur on a corporate polo.
DTF transfer placement for the left chest also depends on the garment. A tee, a polo with a placket, and a quarter zip all have different landmarks. But the chest muscle stays in the same place. So you anchor to the body, not the shirt edge.
Ready to build your merch? Check out our AI-powered Gang Sheet Builder that helps with design placements.
The 3-Finger Rule for DTF Shirt Placement and When It Works
The 3-finger rule is simple. You lay three fingers flat below the collarbone seam and that is where the top of your left chest transfer should start. Three adult fingers is about 2 to 2.25 inches. And for most adult tees and polos, that drop is perfect.
This works well because it scales with the person measuring. A larger person has wider fingers and needs a slightly lower drop. A smaller person has narrower fingers. So it self corrects a little bit. That is why old screen print shops taught it for 20 years.
But the rule has limits. On youth shirts, three fingers is too much drop. You need two fingers, which is about 1.25 to 1.5 inches. On hoodies and thick fleece, three fingers is not enough because the collar is chunky. You need four fingers, about 2.75 inches, to clear the collar seam. On V-necks, you need to measure from the V point, not the collar, so three fingers from the collarbone does not apply.
So use the 3-finger rule as your starting check, then confirm with a tape.
Where to Place DTF Transfers on Shirts: Real Measurements That Work
If you want to stop guessing, use numbers. Numbers are repeatable across a 500 piece corporate order and they keep agencies from getting mixed sizes.
For adult small to XL tees and polos, left chest should be 3.5 to 4 inches wide and no taller than 4 inches tall. That size reads clean on a polo and does not overwhelm a tee. The top of the design should sit 2 to 2.5 inches below the bottom of the collarbone seam, or about 7 to 8 inches down from the shoulder seam at the neck.
To find the side position, fold the shirt in half vertically and crease lightly to find true center. Then measure 3.5 to 4 inches to the wearer's left from that center line. That is the center point of your transfer. This method keeps your DTF shirt placement consistent even if the shirt is a little twisted on the press.
For youth large, drop only 1.5 inches and use a 3 inch wide transfer centered 3 inches from center. That keeps it on the chest and not on the stomach.
DTF Transfer Size and Placement Must Work Together
Size and placement are one decision. You cannot pick them separately.
A 4.5 inch wide left chest on an adult small tee looks like a full front that shrank. It covers too much chest and wraps toward the armpit. A 3 inch wide logo on a 3XL hoodie gets lost and looks like a name tag. That is why DTF transfer size and placement need to be paired.
Here is what we see work in promo production every day. For adult S to XL, use 3.5 to 4 inches wide. For adult 2XL to 3XL, bump to 4 to 4.5 inches wide. For youth, use 2.75 to 3.25 inches wide. For toddler and infant, use 2 to 2.5 inches wide. Height should always be proportional, but never taller than wide unless it is a vertical lockup that was designed that way.
And watch your gap. If you are doing a left chest plus full back combo, keep the front small so the back can be big. A 10 to 12 inch back with a 4 inch left chest is the standard corporate uniform setup that agencies order most.
How to Place DTF Transfers on Shirts Without a Laser Guide
You do not need a laser. You need a repeatable process that any press operator can follow.
First, pre press the shirt for 3 to 5 seconds at 300F to remove moisture and wrinkles. This also shrinks the garment a tiny amount before you place, so your placement does not shift after first wash.
Second, fold the shirt in half and press a light vertical crease to mark true center. Do not use heavy pressure, just a quick 1 second tap.
Third, measure down from the collarbone seam with your fingers or a ruler. Place a small piece of heat tape to mark the top edge where the transfer should start.
Fourth, measure out from center and place the transfer so its center is 3.5 to 4 inches left of center. Use the grid on your heat press pillow if you have one. If not, keep a clear ruler on the press.
Press at 300F to 310F for 12 to 15 seconds with medium pressure at about 60 PSI. Then peel. Let it cool for 5 seconds and do a second 5 second press with a cover sheet to lock in the edges.
Learning how to place DTF transfers on shirts this way gets you within a quarter inch every time, which is what corporate clients expect.
Get Placement Help
How to Position DTF Transfers for Polos, Jackets, and Bags
Polos add a placket. That placket is a visual wall and your placement has to respect it.
For polos, the left chest logo should sit 0.5 to 0.75 inches away from the placket edge. If you butt it right against the buttons, it looks crowded. So your center point moves slightly further left on a polo than on a tee. That is normal. For jackets and quarter zips, keep the same 0.75 inch gap from the zipper. And drop a little lower, about 2.75 inches below the collarbone, because the collar is bulkier.
For tote bags, left chest rules do not apply. Center the design 2 to 3 inches below the top seam of the bag. For hats, center is 2.5 inches wide max. But the question of how to position DTF transfers always comes back to anchoring off a fixed seam, not guessing in the middle of fabric.
This matters for cost. A misaligned left chest on 200 polos at $18 per polo blanks plus $2.50 per transfer is $4,100 in goods you cannot ship. One bad placement ruins the whole run. Measuring takes 10 seconds. Reprinting takes 2 days.
DTF Transfer Pocket Placement vs Left Chest Placement
These are not the same and buyers mix them up constantly.
Pocket placement means you center the art on the pocket, if there is a pocket. Left chest placement means you center it on the chest, even if there is a pocket. For DTF transfer pocket placement, you need to know the pocket size first. Most left chest pockets are 5 to 5.5 inches wide. Your transfer should be 0.5 inches smaller than the pocket on each side, so 4 to 4.5 inches wide max, and centered directly on the pocket.
But if the shirt has no pocket, and most promo tees do not, you still use left chest placement, not pocket placement. If a client asks for pocket placement on a tee with no pocket, clarify. You want left chest, 3.5 to 4 inches wide, centered over the chest muscle. That clarification alone prevents half the art rejections we see at DTF Promo.
And never press a transfer that is wider than the pocket onto a pocket. The edge will lift on the pocket seam after the first wash because the adhesive cannot bridge that thickness evenly.
Why DTF Promo Measures Left Chest Differently for Corporate Orders
We learned this from promo distributors who ship to 50 locations at once. At DTF Promo, we mark every left chest transfer with a small center tick on the film edge so your press operator can line up from center to center fast. That tick adds zero cost and cuts placement errors by about 60 percent in our clients' shops. For orders over 100 units, we also include a paper placement guide sized to your garment that shows exactly where the top and center should sit.
Conclusion
Your left chest placement is the first thing a corporate client checks when they open the box. If it is high, low, or too far to the side, they assume the rest of the order is off too. When you get DTF transfer placement right, that small logo looks intentional and premium. Use three fingers as your quick check, then confirm with real numbers. Keep the adult left chest at 3.5 to 4 inches wide and 2 to 2.5 inches below the collar. DTF Promo checks every left chest file for size before we print, so your next promo order presses straight the first time.
Frequently Asked Questions
What Is the 3-Finger Rule for DTF Transfer Placement?
The 3-finger rule means you lay three flat fingers below the collarbone seam. The top of your left chest transfer starts at the bottom finger. Three fingers is about 2 to 2.25 inches on an adult. It works for most adult tees and polos but needs adjusting for youth and hoodies.
Where Exactly Should Left Chest DTF Go on a Polo Shirt?
Left chest on a polo should be centered 3.5 to 4 inches left of true center and 2 to 2.5 inches below the collarbone seam. Keep 0.5 to 0.75 inches gap from the placket edge so the logo does not crowd the buttons. Size should be 3.5 to 4 inches wide.
What Size Should a Left Chest DTF Transfer Be?
For adult small to XL, 3.5 to 4 inches wide works best. For 2XL to 3XL, use 4 to 4.5 inches wide. Youth should be 2.75 to 3.25 inches wide. Never use a full front size for left chest or it will wrap into the armpit and look oversized.
How Do I Measure Where to Place DTF Transfers on Shirts for a Large Order?
Fold the shirt to find true center. Measure 3.5 to 4 inches left of center for the design center. Measure 2 to 2.5 inches below the collarbone for the top edge. Mark with heat tape. This method for where to place DTF transfers on shirts keeps every press within a quarter inch across 500 units.
Does DTF Shirt Placement Change for Hoodies and Jackets?
Yes, it does. Hoodies and jackets have thicker collars and zippers, so you need more drop. Use four fingers, about 2.75 inches below the collar, and keep 0.75 inches from the zipper. DTF Promo includes a separate placement guide for fleece because the bulk shifts how the logo sits.
How Is DTF Transfer Pocket Placement Different From Left Chest?
Pocket placement centers the art directly on the pocket, not on the chest muscle. Your transfer should be 0.5 inches smaller than the pocket on each side. Left chest placement centers on the chest, even if a pocket exists. Clarify with clients before printing to avoid reprints.
How to Position DTF Transfers So They Look Straight Every Time?
Pre press the shirt, crease center lightly, mark top edge with heat tape, then align the transfer center to your side measurement. Use a press pillow with a grid. Press at 300F to 310F for 12 to 15 seconds. This process for how to position DTF transfers removes guessing.
What Is the Best DTF Print Placement for Corporate Uniforms?
Most corporate uniforms use left chest at 3.5 to 4 inches wide plus a full back at 10 to 12 inches wide. That combo keeps the front clean for meetings and the back visible at events. DTF Promo sees this combo in about 70 percent of agency orders for 100 plus units.
Why Does My Left Chest DTF Design Look Crooked After Washing?
It was likely placed too close to a seam or pressed with low pressure. If the edge sits on a collar, placket, or pocket seam, the adhesive cannot bond evenly and lifts. Press with 60 PSI and do a second 5 second press with cover sheet. That second press adds about 30 percent more wash durability.
How Do I Get Help With DTF Design Placement Before I Order?
Send your garment list and artwork to our team. We check size, center point, and drop for each garment type and send a proof with measurements. DTF Promo does this free for bulk orders so your left chest hits the same spot on every shirt size.